Hi there! We meet again in a new tutorial article. After explaining about Gather Town Extension on the last article, I will explain something different about How to Record on Gather Town. Last week, I manage an event of my client, Kalbe International. They did an annual event called KALBE WonderVerse using Gather Town as the platform. It was the first time they used Gather Town, previously they always used Zoom as the platform. In this year, they wanted something new and decided to hire me as the Gather Partner of their event.
Handling a client that new to Gather was challenging yet open-minding. We need to explain more than when we handle someone who already know about the platform. But by this, I got many new feedback about what a newcomer need to know about the platform. I realized that do a record was the first pain point that my newcomer clients always asking for. Unfortunately, Gather still not yet provided this feature into the platform. I understand why the developers need more time to develop this feature because Gather have a different approach for recording a session, different than Zoom to some degree. That’s why until now we don’t see any record feature on Gather Town.
When the developers don’t provide the feature yet, that’s not the end of the world. Building Gather Town means building creativity. We will find many obstacle but we always have any options to tackle it. We can always use third-party software to achieve anything we need on Gather Town. While looking for an option, I found a software to do a record on Gather Town. It called OBS (Open Broadcaster Software). In this article, I will explain about the basic of this software, from how to install it and how to configure it until you are ready to use it for your Gather Town experience. So grab a coffee and enjoy the article!
What is OBS?
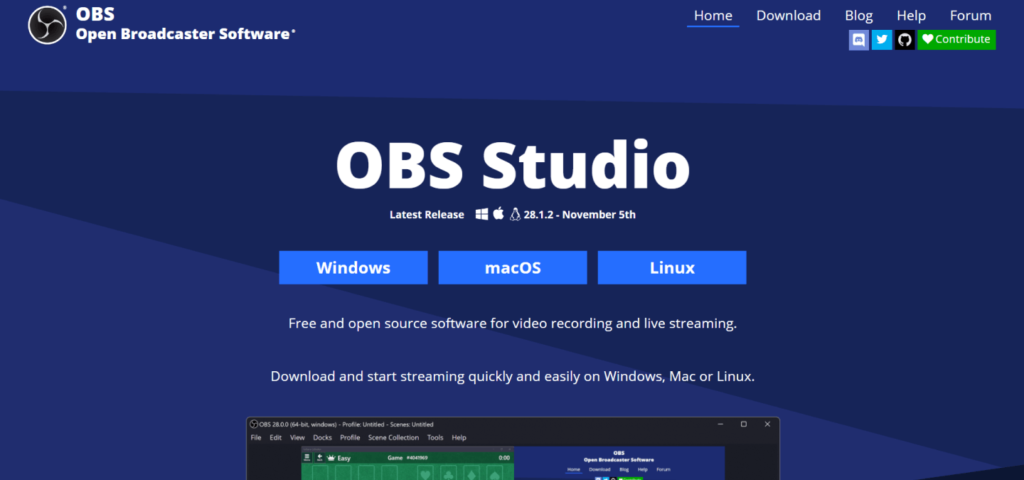
OBS Studio is a free and open source software for video recording and live streaming. If you are a YouTube or Twitch streamers, you might be familiar with this software. But as a general people who never get in touch with streaming, this might be your first time hearing this name. This software have an easy barrier-to-entry for newcomer, since for the basic needs, we only need around 10 minutes to configure and its ready to use. But for more advanced use, obviously we will need more exploration.
In this article I will not explain about the advanced uses about OBS, but only for the basic one until you can do a record on Gather Town. If you are an expert enough on OBS, maybe you can go to another article of mine.
I know about this software from one of my friend while doing a live visual-podcast session in 2018. He use this software to stream and manage some cameras so we can have a more professional camera-cut-sequences rather than just doing one static camera. I thought it was a complicated things for professionals, but he said that it was not. It was quite simple and doesn’t need any particular skillset to start. We only need to install it, setting a little configuration, and it’s ready to use!
Basic Mindset for doing a Record on Gather Town
This is important! I need to explain about this first before you start installing the software. There are a big different mindset you need to know between recording on Gather Town and on Zoom. On Zoom, you just click a record button and then Zoom will record all your session and all that happen on the main room. While on Gather Town, we need to think that we are like a documentation team that holding a cam-recorder on a real offline event. Let say we do a recording on our offline event, and there are three rooms, how to record all that happen on all the three rooms? Yes! By having three cam-recorder on each room. That’s also applies when we do a record on Gather Town.
We can’t simply click record button and the software will record all the things that happen on the entire room. We need to think as we do it on offline event. Because that’s what Gather Town main-soul, bringing offline environment on a online virtual session. I think that’s why it’s quite difficult for the developer to bring record feature on Gather Town. But if that’s happen, that would be cool!
So before doing a record on your Gather Town event, you need to think about how much “camera-man” for your entire space. The recording will walk with the “camera-man” avatar. So whenever the camera-man walk, that’s all the software will record. Also for the discussion and communication that happen on private area. When the camera-man not being on the same private area with the speaker, the camera-man will not receive the audio from that private discussion. That’s means the discussion will not be recorded. So whenever you want to record the session on Gather, just think as you bring the camera and the microphone. When you don’t see and don’t hear it, so it means it will not be recorded.
It’s going to be a bit of a hassle for the first time. But after you get used to it, it will be smoother and easier. Practice makes perfect.
Where and how to install OBS?
To install OBS Studio, you need to go to their website to download the installer. You can download it here. It need a desktop to install this software. You can’t use you mobile phone for this software. Choose which operating system you use, either Windows, MacOS, or Linux. In this explanation I will use Windows for the interface, but I’m sure that it will not quite different with the other operating systems. After you download the installer, just install it on your desktop and do the installation procedure. After you finish the installation, open the software and we can do the configuration.
How to configure it to do a record on Gather Town?
When you first opening your OBS Studio, the interface will be like this one. It looks complicated, but trust me it’s so easy!

For a first-timer, the software will ask you to run auto-configuration wizard. Just accept it and let the software do the basic things about the main configuration. This configuration will consist of resolution, bitrate, encoder, streaming provider and more that can be confusing for a newcomer. But later after you get use with the software, you can change this configuration anytime. Here I will explain some things that you need to know.
Scenes
The first one is scene. Here you will manage your scene you want to make. When you see a TV program, you will see that they have many scene transitions there. In this scenes panel, you will make each one of the scene. Each scene will consist a different sources (the one on the next panel). For doing a record on Gather Town, I think you don’t need to make more than one scene. You just need one scene which is the one you use for recording your Gather Town tab. But you can do any exploration later on recording using more than one scene. Click plus button on the bottom side of the Scenes panel and name your scene as you want.
Sources
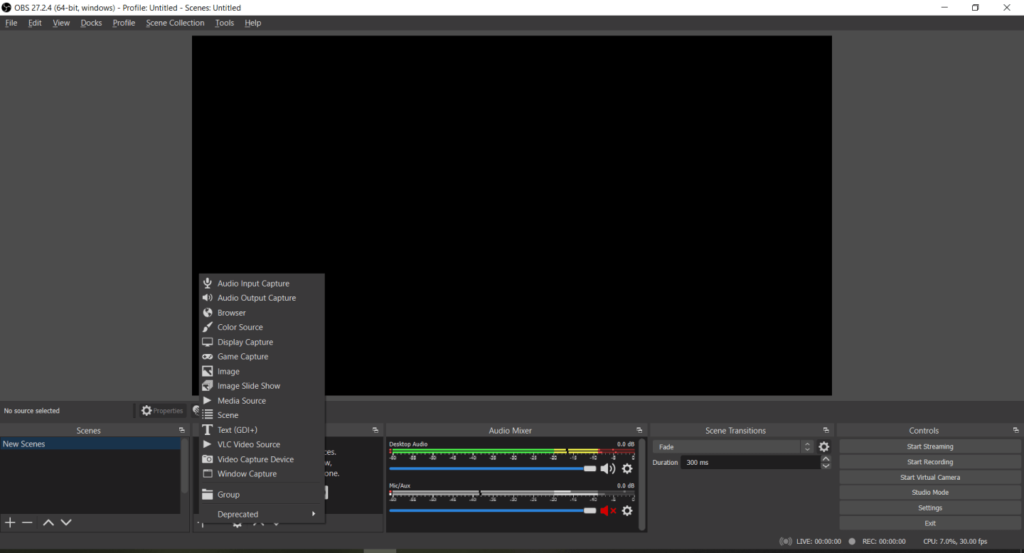
After you setup your new scene, you can start to add sources to your scene. There will be many options of sources you can choose. For first-timer, you don’t need to know all off this, you just need to know about some of sources. Click the plus button on the bottom side of the Sources panel.
The first thing you need to add is Audio Output Capture. This source will capture all the audio that go out from your speaker which is the participant audio on Gather Town. When you not activate this source, you will still hear the audio of the participant on Gather, but it will not recorded on your record. So make sure you setup this source. I had ever did a 1-hour long recording and forgot to setup this source, and believe me it’s super frustrating! After you click the Audio Output Capture, there will be a pop-up, name your source as you want just to differentiate it with other audio output if there are any. After you click OK, you need to choose which speaker you want to add as the audio output. Then click OK and its ready to use.
The second thing is Audio Input Capture. Don’t get it wrong between audio output and audio input. While the output means everything that go out from your computer, audio input means everything that go in to your computer. This include your microphone and any audio input to your computer. If you don’t want your sound and microphone get into the recording, I suggest to not adding this one to your computer. Just skip it, and you will be a silent camera-man.
The last and the most important is Window Capture. This is the main thing we use for doing a record on Gather Town visual. Basically window capture will capture all the visual things that happen on certain window tab on your computer. It will only record that certain window that you choose. After you click plus button and choose Window Capture, name your source. Then choose the window that open your Gather Space. Make sure you already go to your space before configuring this source capture so the window will be shown on the option. Uncheck the Capture Cursor if you don’t want your cursor being captured. Leave other things on default, and click OK. To move your avatar, you still need to do it on your browser, you can’t do it directly from OBS.
After you add Window Capture, you will see your Gather screen on your OBS. Outside the capture you will see a red line with a grid (see picture below). This line will be use for adjusting the screen size of your Window Capture. Just drag a grid on the line to resize. To do a cropping, just press Alt and then drag the grid. The line will be turned into green if it is cropped.
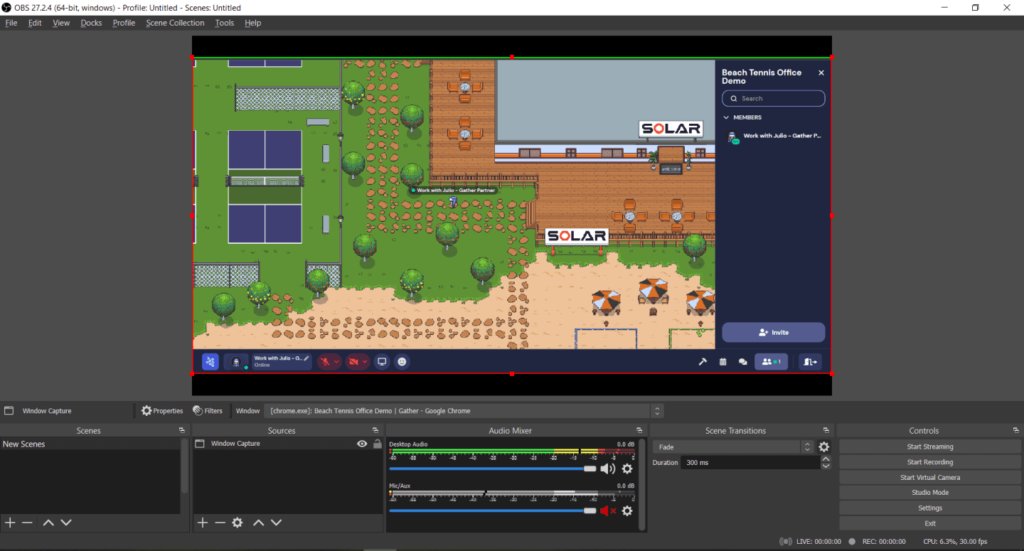
Important note for Windows Capture! Because of this source will capture your entire window. So when you open a new tab on the same window where the Gather Town tab at, the preview will be changed into the new tab. If you want to do a new task, just open a new window rather than open a new tab. The Gather Town window will be dedicated for Gather Town only. By doing this, you can still do another task without disrupting the recording.
For addition, you can also add Text on the scene by adding Text (GDI+). You can add your camera device by adding Video Capture Device in case you want to make the recording more like a vlog rather than just a silence camera-man, but don’t forget to also add the Audio Input Device for your microphone. You can also add Image and more. Just do an exploration by yourselves.
Audio Mixer
This panel will be use for controlling the Audio of your sources. It’s as easy as adjusting the volume. You want to make it louder, just drag it to the right side and vice versa. If you want to mute while recording, just click on the loudspeaker icon beside the gear icon. Keep in mind that this audio mixer will be applied on each sources.
Scene Transitions
As I mention before, for a first-timer you don’t need to change anything in this panel. But if you want to make a bumper to make the recording more professional, you can do this in the scene transitions. I prefer to do the transition on Studio Mode, but in this article I will not explain about this one.
Controls
In this panel, you will control the record button. Below the start streaming button, you will see Start Recording button when you click this button, it will start recording and what previewed on your OBS will be your recording output. When you want to pause the recording, click the pause button beside the stop recording button, then click again to resume the recording. When you pause and resume, it will keep in one recording file. But if you stop it, and then click start recording again, it will be on separate recording file.
Where my recording files at?
To check where the recording files located at, click File on the Menu Bar on the top side. Then click Settings. After that, click Output, and on the Recording you will see where the recording files located at.
It’s quite simple, right? At start you will think that this is only for techies, but right now I believe you are not old-fashioned enough to understand about this. You can start to do a record on your Gather Town event. Now when your team doing a meeting on Gather and it need to be recorded, you can confidently apply as camera-man with your pre-built setup on OBS. While you re-open the OBS, the last setup will still applies, you only need to adjust the Window Capture source by double clicking on it.
If you still have any question related to this tutorial, just left a comment and I will be happy to answer if I can. Also if you want to give appreciation, you can go to my Ko-fi site to give me some coffee. It will be appreciate so much for this site development. See you next time in the next article! Sampai jumpa lagi!