After we know about the general things about Gather in my previous article, I will explain more about Gather Town Mapmaker. Mapmaker is a heart of Gather Town. In Mapmaker, we could customize our object in our space. If you land into this article first before knowing about what is Gather Town, I recommend you to read the previous article. Because in this article, I will explain the detail about 7 Basic Things of Gather Town Mapmaker. Enjoy!
Where to find Mapmaker
To access mapmaker, first thing first, you need to be the room admin a.k.a the creator of the space. Or at least you are given the access to be admin or builder by someone. You can check it by going to the Gear Icon on the left panel, and go to Space Role.
After that you can access the Mapmaker by clicking the Hammer Icon on the left panel. In my opinion, doing mapmaking is easier when you are doing it on Desktop rather than doing it on mobile. There are 3 option you can choose after you click the Hammer Icon : Open object picker, Upload image, Edit in Mapmaker.
To just placing object based on Gather asset, you can choose Open Object Picker. To placing some image from you computer into Gather, choose Upload Image. Make sure you already set the resolution into 32×32 pixel per tile. To access full things about Mapmaker, choose Edit in Mapmaker. Here you can upload background, place object, and set tiles effect. Here I will just explain about the basic things about Mapmaker, I will post the advance things later on.
Rooms Management
Basically Gather is a virtual space management, and inside a space, there are ‘smaller space’ that we call Room. Please dont be confuse about the term of Room as the smaller space in one space, and the Room as literally room that contain object. To make it easier, I often make it just 1 Room (smaller space), and divided it as many rooms for different usage. But sometimes I need it to divide it into more than 1 Room (smaller space) when I need to make a space with more than 1-floor. You can see the demo space that I make 3-floor cafe & coworking space here.
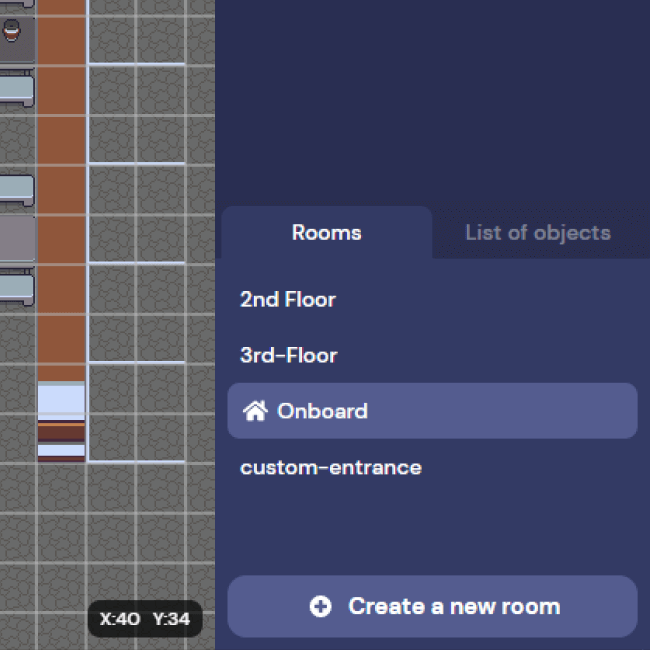
Before you make some map, make sure you already know about how you manage the Room. Whether you need it to be just 1 Room, or make it into more than 1 Room to divide the participant more privately. Because when you divided it into more than 1 Room, the participant can’t meet each other between each room. Except you place a portal that connecting each Room.
Layering
Placing object in Gather is more than just dropping some object. It consist a layering system. The higher the order, the upper the position of the object. So be careful when you placing object that stack each other. Dont forget to adjust the order of the layer to make it better visually.
Select, Stamp, Eraser, and Hand

When you do mapmaking on Gather, you will get used with this 4 tools. You can find this tool on the left panel on Mapmaker. The keyboard shortcut for Select is V. For Stamp is B. For Eraser is E. For Hand is H. Quite easy right?
Select is the tools to just do a selection for an object. If you press V and click on some object, the object description will be appear on the right panel. To adjust the layer/order of the object, you need to used this Select Tools.
Stamp is the tools to place some object to the map. Stamp is the only one tools that you can use to placing object. And of course the Eraser is the opposite tools of Stamp. Eraser is for erasing some object from the map.
Hand is just an secondary tools that you can use to move your screen easier. Actually there are one more tools. That is Zoom Tools. But me personally not using that so much because it easier to just use Ctrl + Scroll Up and Scroll Down on your mouse to do Zoom In and Zoom Out.
Oh, one more thing! I almost forget it! There are Undo and Redo Tools in mapmaker. Just same as how Undo and Redo did on all things, you can use keyboard shortcut Ctrl+Z for Undo and Ctrl+Shift+Z for Redo. You will use this tools so much! Trust me!
Object Interaction

To give more engagement, Gather provide us with interacable object. There are 5 type of interaction that we can choose to. The first one in embedded website. Using this type, when you move into some object and press X, you will be directed into a screen that linked into some website site. The second one when you do interaction, you will see some image/poster. Also you can see a preview image even without pressing X.
The third one basically same with the second one, but the position of the preview video is different. The fourth one is external call, here you can put some url link that can be clickable, and after clicking the participant will be directed to that link in the new tab. For default, Gather put this to make interaction within different video conference platform like Zoom or Google Meet without closing the Gather Tab.
And the last one is note object. You can use this one when you want to just making a note pop-up when participant press X to the object. The bad thing about note object is you cant use Enter to divide the note into some paragraph. I dont know yet how to make this, if you know you can left some comment. It will be appreciated!
For more interaction outside the 5 types above, there are a new interactive feature from Gather. That is Gather Town Go kart feature where you can drive a literally go kart around your space to make your move faster. I already make an article about the basic of Gather Town Go Kart feature here.
Tile Effect

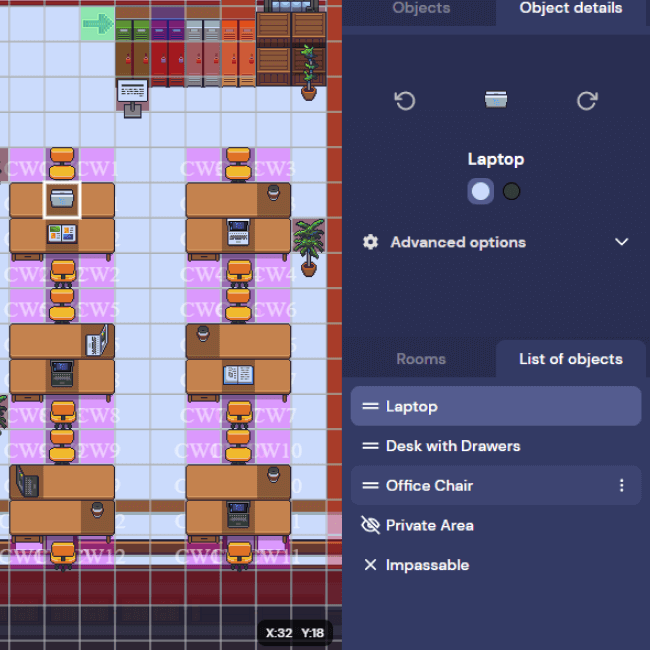
Tile Effect is one of the essential things in Gather Mapmaker. There are 5 type of tiles effect in Gather. The first one is Impassable, to make some tiles can’t be passed by the participant. The second one is Spawn, to decide where participant will be spawn when they accessthe space for the first time. The third one is Portal, to make connection between Room or between Space.
The fourth one is Private Area, to make some tiles will be private area. When participant come into some private area, they can speak each other without being heard by other outside the private area. And the last one is Spotlight, to make a participant that stand in this tile can be heard by all participant in the same Room, regardless of they are in the same private area or not.
Wall & Floor
Not only object, one map is consist of a wall and floor. The wall and floor actually can be edited directly through Gather, but it still in Beta and sometimes it little bit buggy. The easier way to make wall and floor is design it outside Gather, then export it as .png, after that you can upload it into Gather by clicking the hamburger icon on the upper left side, and then choose Background & Foreground, choose Upload Background.
So what is Foreground? To make it simple, everything in Gather is more like a sandwich. The bottom part is Background, the middle part is Gather Object then Your Avatar, and the upper part is Foreground. Using foreground is not compulsory. But using foreground can make the experience seamless, rather than just walking in the roof when it should be under the roof.
Please take a note that if you want to make foreground, make sure its on the same resolution with its background. And the foreground design layering exactly in the same place with the background. Its hard to just explaining here, better to take trial-and-error by yourself to seethe difference.
Third Party Software
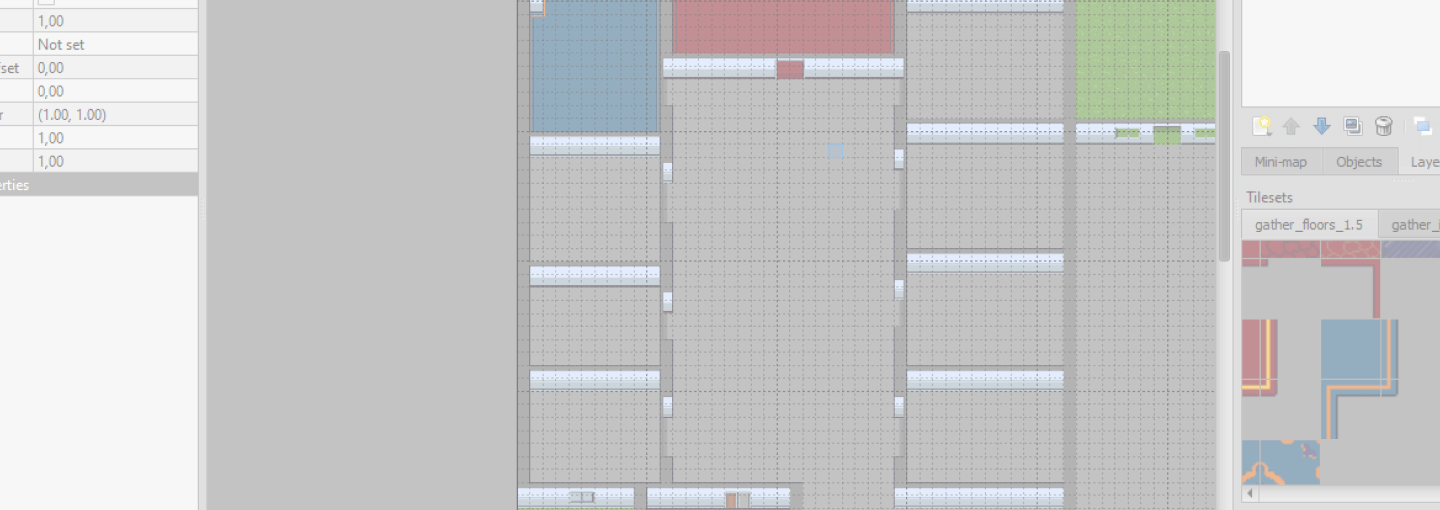
Is using third party mandatory? No! You can do mapmaking only using Gather, but with some limitation. When you love freedom of mapmaking, I think its better for you to use third party to design it. Third party software will be use for designing the background and foreground of the map. For object, its easily to use Gather asset, because Gather already give a ton of asset to use for free.
Basically you can use any kind of designing software as third party software. As long as the output file is .png, all is well. Me personally use software called Tiled to make the map, because it easier to place the tileset to be a map here. And for pixel art designing, I used software called Aseprite. This software is dedicated to pixel art, so it will be easier to make pixel art here. After I clear with my tileset in Aseprite, I upload it to Tiled, then I make a bigger map here, export it into png, then upload it into Gather Background and Foreground. I will make a different post explaining about this 2 software later, so if you are interested, please keep in touch. I will be so happy to share.
So thats all 7 Basic Things of Gather Town Mapmaker that I know after using Gather and doing Gather Mapmaker for months. If you still have any question related to mapmaker, just left a comment and I will be happy to answer if I can. See you next time in the next article! Sampai jumpa lagi!
7 thoughts on “7 Basic Things You Need to Know about Gather Town Mapmaker”
Pingback: 5 Unique Hotkeys in Gather Town You Need to Know - With Julio
Pingback: You Need to Know this Before You Make Gather Town Go Kart - With Julio
Pingback: 3 Things You Need to Know for Doing Live Music Event on Gather
Pingback: How to Add Custom Music to Your Gather Town Space? - With Julio
Pingback: Add Pets to Your Gather Town Space to Make Your Space More Attractive
Pingback: How to Setup a Poster for your Presentation in Gather Town - With Julio
Pingback: How to Setup Custom Spawn Area to Your Gather Town Space - With Julio